When it comes to video editing for YouTube, success isn't about Hollywood-level special effects. For entrepreneurs and business owners, it’s all about strategic efficiency. It’s the art of turning raw footage into a sharp, engaging video that respects your audience's time and, most importantly, helps you hit your business goals.
This means leaving behind the slow, artistic editing methods and embracing a modern workflow built for business clarity and speed. Your goal is to get your message across effectively, and that's where a tool like Tubentum becomes a shortcut to that ideal state.
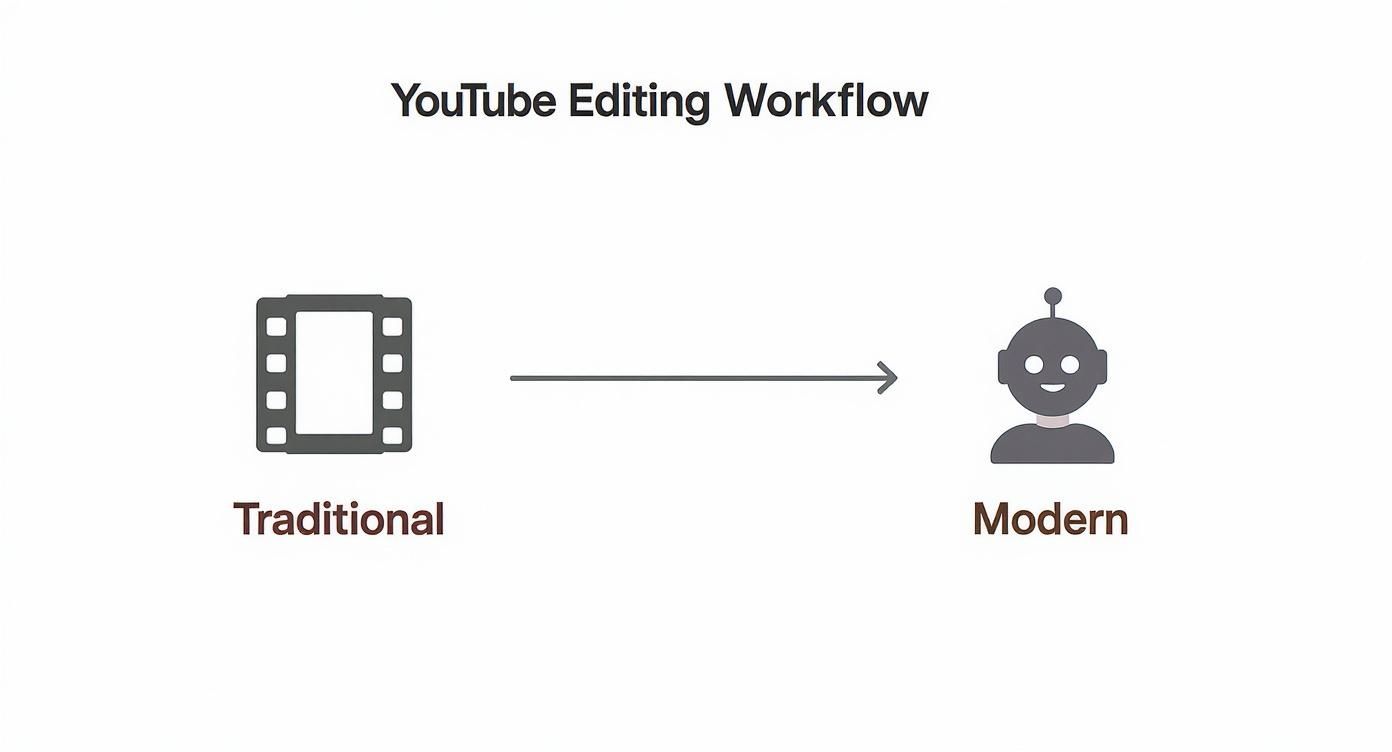
Building Your Modern YouTube Editing Workflow
Think of this as your new playbook for business video editing. In a game where consistency is everything, your editing process is your secret weapon. The old way of doing things—painfully scrubbing through hours of footage, hunting for every little mistake, and manually cutting every pause—is a massive time-sink that a growing business simply can't afford.
A modern workflow completely changes the game. It uses smart automation like the features found in Tubentum to take care of the grunt work, which frees you up to focus on what really matters: your message and your strategy. This isn't about cutting corners; it's about working smarter. By automating the most repetitive parts of the edit, you can put out better content, more often. That's the real key to growing your business with video.
The Shift From Manual To Automated Editing
The real difference between old-school editing and the modern business approach is where you put your energy. The traditional method forces you into hours of mind-numbing, mechanical tasks before you can even think about the creative side of things. The new way, powered by tools like Tubentum, gets you to the high-value, strategic stage almost instantly.
For creators and businesses, the objective is simple: spend less time on tedious tasks like cutting silences and filler words, and more time on high-impact activities like telling a great story and reinforcing your brand. A smooth, efficient process is absolutely essential if you want to scale your video content.
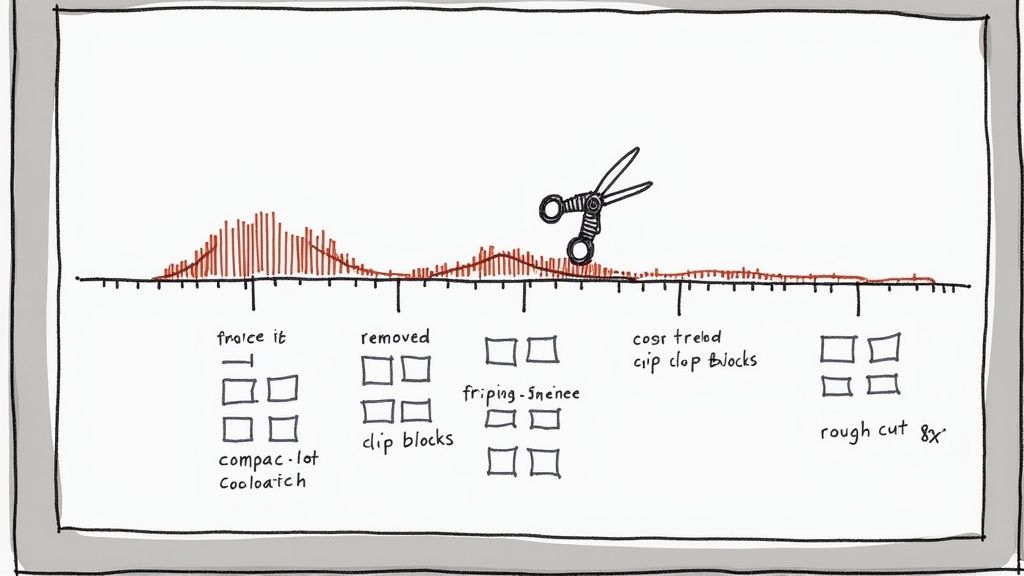
This visual shows the stark contrast between the slow, step-by-step grind of traditional editing and the fast, efficient flow of a modern, AI-powered approach.
As you can see, automation isn't just a small tweak—it's a massive shortcut that combines multiple manual steps into one simple, powerful action.
Why An Efficient Workflow Matters Now More Than Ever
The pressure for businesses to produce high-quality content quickly is immense. Consider this: 500 hours of video are uploaded to YouTube every single minute, competing for the attention of over 2.5 billion monthly users. To stand out in that sea of content, you need a polished, professional look that a slow, clunky workflow just can't deliver.
Here's a side-by-side look at how a modern workflow stacks up against the old-school grind.
Modern vs Traditional YouTube Editing Workflow
| Editing Stage | Traditional Method (Manual) | Modern Method (AI-Assisted with Tubentum) |
|---|---|---|
| Initial Rough Cut | Manually scrubbing timeline to find and delete long pauses. (1-3 hours) | One-click silence removal. (Under 5 minutes) |
| Filler Word Removal | Listening through audio to manually find and cut "ums," "ahs," etc. (1-2 hours) | Automatic detection and removal of filler words. (Under 5 minutes) |
| Intro Hook Placement | Manually finding the best clip from later in the video to place at the start. (30-60 mins) | AI identifies and places a compelling hook automatically. (Instant) |
| Pacing & Flow | Manually trimming clips and adjusting timing to create rhythm. (2-4 hours) | AI-powered "Magic Edit" sets an engaging pace instantly, needing only minor tweaks. (15-30 mins) |
| Total Time (Avg.) | 4.5 - 10 hours | ~30-45 minutes |
This is precisely where Tubentum serves as a shortcut to efficiency. It's designed to be your video editing co-pilot, handling the heavy lifting of removing silences, cutting filler words, and even automatically placing hooks in your intro.
This is about more than just saving a few hours. It’s about building a sustainable content creation workflow that lets you show up for your audience consistently, without the risk of burnout.
Create Your Strategic Pre-Editing Blueprint
Amazing business videos aren't born in the editing suite. They're forged long before you ever click "import." Too many creators, especially those running a business, dive straight into their editing software without a plan, and that’s a surefire recipe for frustration and wasted hours.
Think of it this way: you wouldn’t build a house without a blueprint. Your pre-editing plan is that blueprint. It’s what turns a chaotic jumble of clips into a smooth, streamlined assembly process.
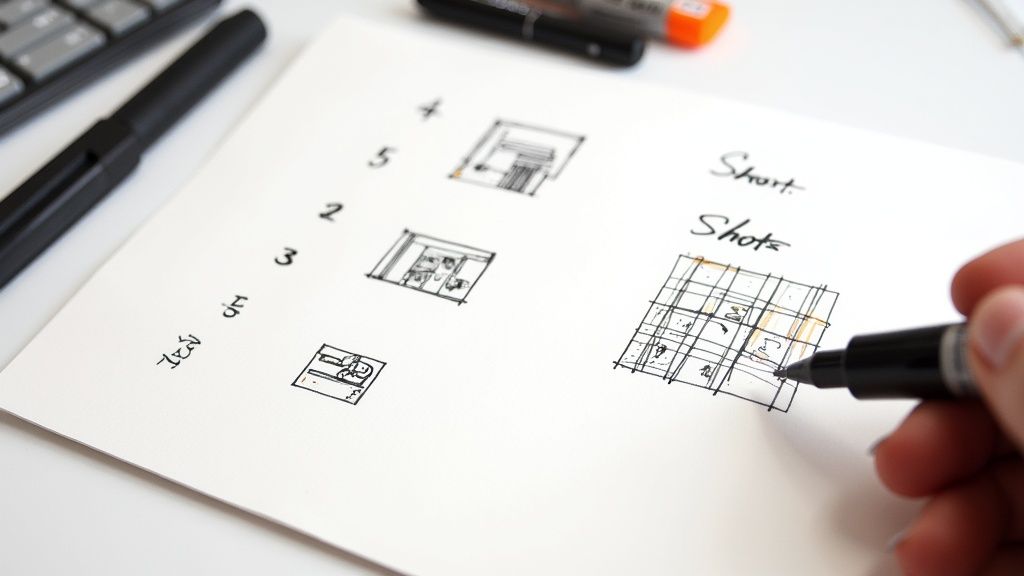
This isn't about adding more work to your plate. It's about doing the right work upfront so that the actual edit becomes ten times faster and more effective.
Scripting With The Edit In Mind
Your script is more than just the words you'll say; it's the very foundation of your final edit. A well-written script naturally leads to a well-paced video. Instead of writing massive paragraphs, think in short, punchy segments. This makes the content easier for your audience to follow and way easier for you to edit.
Here's a practical tip that will save you hours: write your visual cues directly into the script. Make notes for where you want to add B-roll, pop up some on-screen text, or insert a graphic. This simple habit transforms your script from a simple document into a shot-by-shot guide, killing all the guesswork later on.
By thinking like an editor while you write, you can anticipate where cuts will happen and what visuals you'll need. This foresight is the difference between a seamless workflow and a frustrating, disorganized mess.
For example, when I mention a statistic, I’ll literally type [ON-SCREEN TEXT: **73% of viewers**] right into the script. Come editing time, I know exactly what to do and where to do it. No second-guessing.
The Power of Intentional Pausing
This is going to sound completely backward, but trust me. One of the best things you can do for your editing workflow is to intentionally pause while you're recording.
When you mess up a line or lose your train of thought, don't just try to power through. Stop. Take a breath. Then restart the sentence cleanly.
You're creating what feels like a long, awkward silence in the moment, but you're actually creating a gift for your future self. Those clean breaks are pure gold for AI editing tools.
This small habit makes your raw footage the perfect input for a tool like Tubentum's Silence Cutter. The AI doesn't have to guess where a mistake happened; it sees a clear, silent gap and snips it out with perfect precision. This gives you a nearly flawless rough cut before you've even laid a finger on the timeline. It’s a massive time-saver.
Batching and Organization
If you're serious about using YouTube for your business, filming and editing one video at a time is the scenic route to burnout. The smart money is on batch recording. Film several videos in one session. You'll get into a creative rhythm, make the most of your setup, and build a healthy backlog of content just waiting to be edited.
Just as important is having a rock-solid file organization system. Create a main folder for each video project, and inside that, create subfolders:
- A-Roll: Your main talking-head footage.
- B-Roll: All your supplementary clips and screen recordings.
- Audio: Any separate audio files from external mics.
- Graphics: Logos, thumbnails, and other visual elements.
This kind of structure means you'll never waste precious creative energy hunting for a missing file again. Everything is exactly where it needs to be. When your assets are organized and your intro is sharp, you're set up for success. Speaking of which, for more strategies on grabbing viewer attention from the start, check out our guide on how to start a YouTube video.
Generate Your Rough Cut with AI in Minutes
This is where the magic happens for busy professionals. Honestly, this is the moment you get your life back. The old way of editing—that first soul-crushing pass where you hunt down every awkward pause, every "um," every verbal misstep—is where productivity goes to die. It's a chore. It takes hours. And it’s the single biggest reason so many businesses give up on video.
Good news: that entire process is now obsolete.
Welcome to the one-click rough cut. Instead of painstakingly scrubbing through hours of footage, you can now lean on AI to do the heavy lifting. Tubentum will generate a tight, coherent rough cut for you with incredible speed. This isn’t just a small tweak to the workflow; it's a complete game-changer.
Think of it this way: this automated first pass gets you 80% of the way to a finished video almost instantly. That dreaded first editing session goes from a manual grind to a simple, automated step. You’re free to pour your energy into what really matters—the strategic touches that hook your audience and drive business results.
The Magic of Automated Silence and Filler Word Removal
Let's get practical. You just finished recording a 20-minute video. If you look at the raw file, it’s probably littered with dozens of pauses where you were gathering your thoughts, not to mention a whole symphony of "ums," "ahs," and "you knows." Finding and removing them one by one is like trying to find a needle in a haystack.
AI-powered tools flip the script entirely. They scan your audio and transcript to find and destroy the two biggest culprits of bad pacing:
- Dead Air: Those long, unnatural silences that kill your video's momentum and send viewers clicking away.
- Filler Words: Those little verbal tics that can unintentionally weaken your message and make you sound less confident.
With a tool like Tubentum, you just upload your raw footage and let the AI take over. The Silence Cutter automatically snips out the dead air, and the Filler Word Remover hunts down and deletes every last "um" and "ah." If you want to get into the nitty-gritty, we have a whole guide on how to remove filler words from a video.
What you get back is a clean, punchy timeline that flows beautifully. All that tedious work? Done in minutes.
Transforming Hours into Minutes: A Real-World Scenario
Let's put this into perspective. Imagine a business owner creating a weekly YouTube update. The old-school workflow for just the rough cut probably looks something like this:
- Manual Review: Watch the entire 30-minute recording to spot the big mistakes. (30 mins)
- Silence Cutting: Go through the timeline, manually slicing out every pause longer than a second. (45-60 mins)
- Filler Word Hunt: Listen intently, making dozens of tiny, precise cuts to remove every "um" and "ah." (60-90 mins)
Total Time Spent on a Rough Cut: Over 2.5 hours. That’s more than two hours that could have been spent talking to customers, planning the next video, or actually running the business. An AI tool condenses this entire ordeal into less than five minutes.
This isn’t just a neat trick; it’s quickly becoming the new industry standard for business video. An estimated 48.22 million users are projected to pay for premium video editing software by 2025, with nearly 40% of editors already planning to use AI for automation. It's clear where things are headed. This major shift toward smarter, faster workflows is all about prioritizing strategic impact over manual labor.
By adopting this AI-first approach with a platform like Tubentum, you’re not just saving time—you’re gaining a massive competitive edge. You can produce sharp, professional-sounding content consistently, without the burnout. This is how you build a real, sustainable presence on YouTube and turn your channel into a powerful asset for your business.
Bring Your Story to Life with Pacing and Graphics
Okay, the AI has done its job. You've got a clean rough cut—all the "ums," awkward pauses, and dead air are gone. This is a huge leap forward, but let's be real: this is just the skeleton. Now it's your turn to add the flesh and blood, the personality that makes people want to watch.
This is where the practical art of business editing begins. We're going to talk about the rhythm of your video—its pacing—and how to use simple graphics to make your points stick. The goal isn't to create a cinematic masterpiece. It's about maintaining energy and making sure your message hits home, guiding your viewer from one point to the next without a single chance for them to get bored and click away.
This is the human touch AI can't quite replicate yet. You're about to layer in the visual flair that clarifies your ideas, reinforces your brand, and keeps your audience hooked.
Finding Your Video's Heartbeat
Pacing is everything. It's the underlying rhythm that makes a video feel either energetic and engaging or slow and painful. For business content, the goal is a dynamic flow that feels professional and keeps things moving.
Here’s how you can nail it:
- Embrace the Jump Cut: Don't be afraid to cut within the same shot. Snipping out a quick breath or a tiny pause tightens up your delivery and injects a shot of energy. For talking-head videos, this is one of the easiest ways to make your performance feel punchier and more confident.
- Show, Don't Just Tell (with B-roll): B-roll isn't just filler; it’s a core part of your business storytelling. When you talk about a website, cut to a screen recording. Mention a concept? Find a great stock clip that illustrates it. This visual variety is essential for breaking up the monotony of a single talking head.
- Add Movement with Zooms: You can create a sense of motion without ever moving your camera. Add subtle digital zooms to emphasize key phrases. A slow, gentle push-in can draw the viewer's focus to an important statement, while a quick "punch-in" can highlight a specific detail.
This is where you'll really appreciate an AI-assisted start. Because a tool like Tubentum has already handled the tedious work of removing silences, you can skip straight to the high-value creative work. Instead of spending hours on cleanup, you get to focus entirely on these techniques that make a real impact on your message.
You Have 15 Seconds to Make an Impression
Let's be blunt: you have a tiny window to convince someone to stick around. Those first 15 seconds are make-or-break. Your hook needs to grab them by the collar and immediately promise them something valuable in return for their time.
Even if the AI found a decent opening line, you can take it to the next level. Think about layering a bold, intriguing title card over your opening statement. Or, try creating a quick montage of the most exciting B-roll clips from later in the video to tease what's coming. A strong verbal hook combined with compelling visuals is a killer combo for keeping that audience retention graph high.
Using Graphics to Make Your Message Unforgettable
Graphics are your best friend for making complex information digestible and memorable. They shouldn't be flashy distractions; they should serve the story. In business and educational videos, this isn't just nice to have—it's essential.
Must-Have Graphics for Your Videos:
- On-Screen Text: When you drop a key statistic, name-drop a tool, or share a critical takeaway, put it on the screen. It reinforces the point and is a lifesaver for people watching with the sound off.
- Lower Thirds: Use these to introduce yourself or a guest. A clean, professional lower third instantly adds a layer of polish and authority to your video editing for YouTube.
- Branded Touches: Don't be shy about placing your logo subtly in a corner. It builds brand recognition without being annoying. Sticking to a consistent color scheme and font across all your videos also does wonders for building a recognizable brand.
Just remember, less is often more. Your goal is to support your message, not clutter the screen and distract from what you're saying.
One final, powerful touch? Captions. So many people watch videos on their phones in public without sound. Captions are no longer optional; they're critical for accessibility and making sure your message lands. This is another spot where a tool like Tubentum gives you a massive shortcut, with an auto-captioning feature that burns accurate subtitles right into your video. It's a simple step that ensures your message gets through, no matter how someone is watching.
Add Professional Polish with Audio and Color
Alright, you've done the heavy lifting. The story is tight, the pacing feels right, and your graphics are in place. Now it’s time for the final 10% that makes 90% of the difference: the polish. This is where you elevate your video from just "content" to a truly professional asset for your business.
Think about it—shoddy audio or muddy, washed-out video can instantly kill your credibility, no matter how brilliant your message is. You don't need to be a professional sound engineer or colorist to nail this. It's about mastering a few fundamental fixes that tell your audience you care about their experience.
This stage is all about making your video a pleasure to watch and listen to. Let's dive in.
Mastering Your Audio for a Flawless Listening Experience
Here’s a hard truth: viewers are far less forgiving of bad audio than bad video. They’ll put up with a slightly grainy shot, but if they have to strain to hear you over a hum or the volume keeps jumping around, they're gone. Your voice is the direct line to your customer, and it needs to be crystal clear.
The great news is that you don’t need an expensive recording studio. A few key tweaks in post-production can make a massive difference.
Essential Audio Fixes:
- Noise Reduction: Every room has some kind of background noise, whether it's your computer fan, an air conditioner humming, or a distant refrigerator. A simple noise reduction filter can intelligently scrub that hiss away, making your voice pop with incredible clarity.
- Volume Normalization: Ever watched a video where you’re constantly reaching for the volume knob? It’s infuriating. Normalizing your audio track locks in a consistent level from beginning to end, creating a smooth, professional listening journey.
- Equalization (EQ) Boost: A little EQ can add a ton of richness and presence to your voice. I often find that a small boost in the bass frequencies adds a nice warmth, while a tiny lift in the treble brings out the crispness and clarity.
Don't let this intimidate you. These fixes used to require complex software, but not anymore. Tubentum's "auto-enhance" features act as a shortcut, handling all of this for you and giving your audio a broadcast-quality finish without the headache.
Simple Color Correction for a Sharp, Vibrant Look
Just like with sound, a few simple color tweaks can transform your video from dull and flat to sharp and engaging. This is especially true if you’re shooting with a smartphone or webcam, as their automatic settings often leave footage looking a bit lifeless.
We’re not talking about complex, cinematic color grading here. Our goal is correction—just making things look clean, natural, and professional. It’s no different than adjusting the brightness on a photo before you post it online.
The Three Pillars of Basic Color Correction
Get comfortable with these three sliders in your editor. They’ll do most of the work for you.
- Exposure and Contrast: This is always your first stop. Is the video too dark or washed out? Fix that with the exposure. Then, give the contrast a slight nudge to make the image "pop" and create a nice separation between light and dark areas.
- White Balance: If your video has a weird blue or orange tint, your white balance is off. This setting simply tells the editor what "true white" should look like, which snaps all the other colors into their natural-looking place. Find something white in your shot and adjust until it looks right.
- Saturation: This controls how intense the colors are. A little boost here can make your video look more vibrant and alive. Just be careful—go too far, and you'll end up with an unnatural, cartoonish look, especially with skin tones.
These final touches on audio and color are the secret handshake of professional video editing for YouTube. They signal a commitment to quality that builds subconscious trust, making viewers far more likely to stick around and take you seriously.
Giving Your Video Its Best Shot at Success
You've done the hard work. The cuts are sharp, the pacing is tight, and the audio is crystal clear. But the journey isn't over when you hit "render." In fact, what you do next can make or break your video's performance. This is the moment you shift from editor to marketer, setting your video up to be found and clicked on by your ideal customers.
It all starts with the thumbnail. On a busy YouTube homepage, your thumbnail is your video's billboard. It has about one second to grab someone's attention. It needs to be bold, clean, and promise a solution or spark curiosity. Think high-contrast colors, an expressive face (yours!), and a tiny bit of text that makes people need to know more.
Nailing the Technical Details: Export and SEO
Before you upload, you need to get the technical settings right. For most business content, the sweet spot is exporting at 1080p (1920x1080) resolution using the H.264 codec. This gives you that crisp, professional look without the headache of a massive file that takes all night to upload.
With your video file ready, it's time to craft the metadata. This is how you tell YouTube's algorithm what your video is about so it can show it to the right audience.
- Catchy, Searchable Titles: Your title has two jobs: include keywords people are searching for and create a "curiosity gap" that makes clicking irresistible.
- Descriptions that Deliver: Use the first couple of lines to hook the viewer by summarizing the video's core value. Below that, add more details, relevant keywords, timestamps for easy navigation, and links to your website or offers.
- Smart Tagging: Tags aren't as powerful as they used to be, but they still help YouTube categorize your content. Think like your customer—what broad and specific phrases would they search for to find your video?
The work you pour into creating and editing your content is immense. Rushing through the final steps of titling, thumbnail design, and SEO is like running a marathon and quitting 10 feet from the finish line. Give your work the launch it deserves.
The Secret to Consistent Growth: A Better Workflow
Let's be real: juggling editing, creating thumbnails, writing descriptions, and publishing on a regular schedule is exhausting. It's often this final stretch that causes business creators to burn out or fall off a consistent schedule.
This is where having a seamless, end-to-end system can completely change the game.
Imagine a world where your video editing for YouTube flows directly into optimization and publishing, all in one place. That's the power of a platform like Tubentum. By automating the most tedious editing and pulling all these final steps into a single workflow, you're not just saving a few hours. You're freeing up mental energy to focus on what really matters: your ideas and your business strategy. This is the ultimate shortcut to building the momentum that leads to real channel growth.
Ready to stop drowning in manual edits and start publishing polished, professional videos in a fraction of the time? See how Tubentum can auto-edit your talking-head videos with a single click. Try Tubentum today and get back to growing your business.